

How to run Sierra on your old Macbook Pro/iMac
For those of you do not know that your old Mac might still be able to run the latest macOS Sierra with a third party ptach, here is the quick reference and steps:
First your Mac needs to be in the following list:
- Early-2008 or newer Mac Pro, iMac, or MacBook Pro (MacPro 3,1 and 4,1, iMac 8,1 and 9,1, MacBook Pro 4,1, 5,1 5,2, 5,3, 5,4, and 5,5)
- Late-2008 or newer MacBook Air or Aluminum Unibody MacBook (MacBookAir 2,1, MacBook 5,1)
- Early-2009 or newer Mac Mini or white MacBook (Macmini 3,1, MacBook 5,2)
- Early-2008 or newer Xserve (Xserve 2,1)
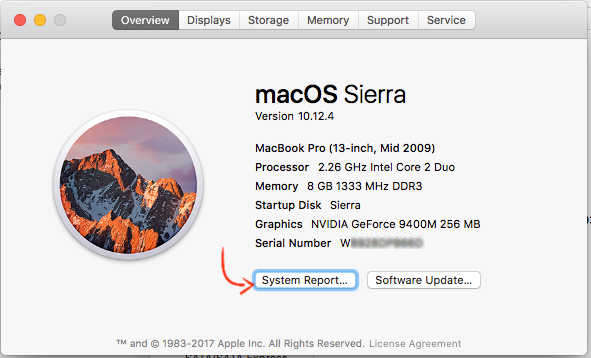
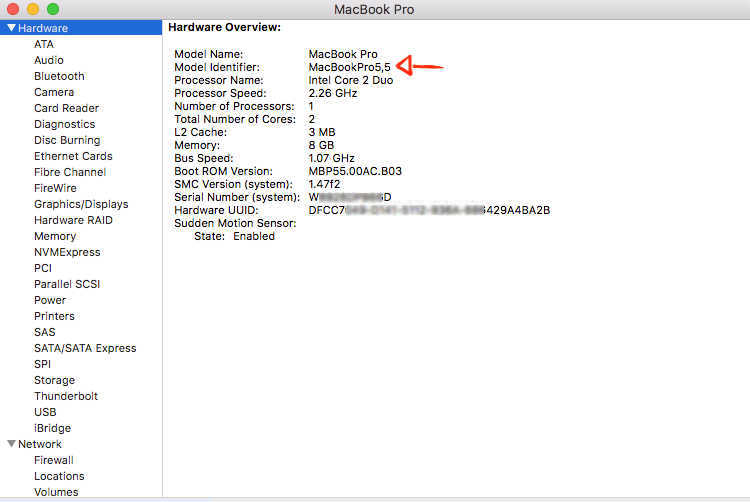
How to find your Mac version:
Click the Apple icon on the top menu -> Click About this Mac -> then System Report, you will see the exact mac version, if you are not sure, check the screenshots here.
If your Mac is not listed above, unfortunately, it's not supported by the patch yet. Now you need some tools to do the job.
Utilities you need:
- macOS Sierra Installer App. This can be obtained from the Mac App Store using a machine that supports Sierra
- A USB drive with at least 8 GB
- A copy of the patch - You can download from the author's website here (Current version: 4.2.7). Please note, current version only support Sierra 10.12.4, if you would like to install previous macOS like 10.12.3 or 10.12.2, you will need earlier patch such as 4.2.3 is working with 10.12.3
Steps (from author's website):
- Insert your desired USB drive, open Disk Utility, and format it as Mac OS Extended (Journaled).
- Open the "macOS Sierra Patcher" tool, and browse for your copy of the macOS Sierra Installer App.
- Next, select your USB drive in the Target Volume list, and click "Start Operation."
- When the operation completes, boot your target unsupported Mac off the USB drive you just created.
- When the installer boots, open Disk Utility.
- Select the disk or partition you want to install on, and erase it, ensuring to use Mac OS Extended (Journaled) as the filesystem type. If formatting an entire drive, ensure GUID is selected.
- Install macOS normally onto the desired volume.
- When the install completes, reboot back onto the installer drive. This time, open the "macOS Post Install" application.
- In the application, select the Mac model you are using. The optimal patches will be selected for you based on the model you select. You can also select other patches of your choosing.
- Select the volume you have just installed macOS Sierra on, and click "Patch." When it finishes patching, click "Reboot". It may sit there for a few moments rebuilding caches before rebooting.
- When it reboots, it should now boot into a fully working copy of macOS Sierra.
All credit goes to the author dosdude1, please visit dosdude1's website for detailed screenshots. There are some known issues and workaround, please check it out as well.